Wednesday, July 11, 2012

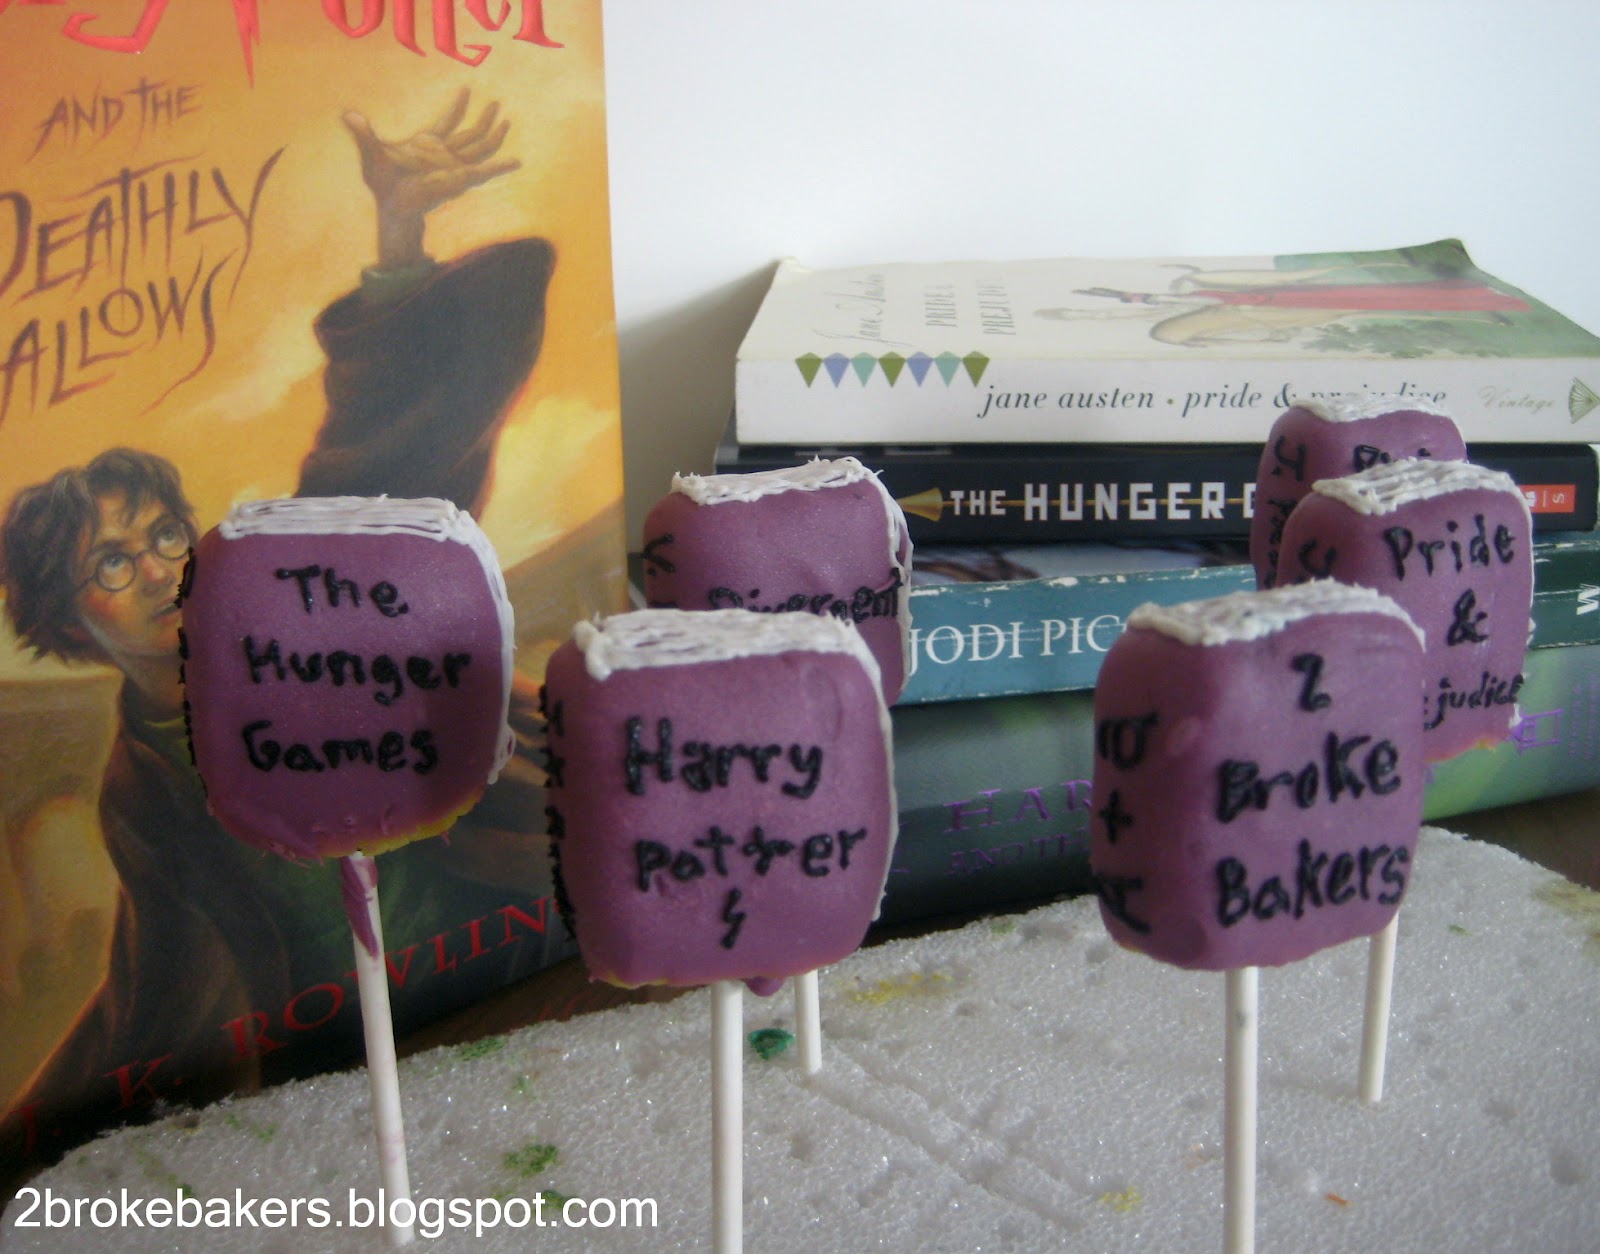
Our Favorite Books Cake Pops


During the summer we read...and read...and read some more.  We're in a constant battle between finding new greats and caving in to re-read those older series that we know and love.  (Case in point: We've probably re-read Harry Potter at least 5 times each). Inspired by this inevitable summer activity, we decided to join our library with our kitchen for a short while and turn our beloved novels into cake pop form.  This way we can get the best of both worlds--baking and reading.  If you haven't seen our other cake pop posts be sure to check out Cake Pops 101,  our greatest hits, and the recipe section to view other cake pops we've made in the past.


Start the process as always with a baked cake.  Lemon cake is the flavor of this cake. We wanted to do something different this time.  It turned out a strong flavor and is a refreshing change from our preferred chocolate and chocolate frosting combo.

If you have a conversation with us it will be pretty clear that we have different opinions for many things.  However we are unanimous in our decision to have Aubree shape the cake pops... every single time.

Aubree wanted to share this trick to make the shape: use a knife to help make crisp lines.  Instead of relying on your hands use a knife to ensure a good shape.

These cake pops were a disaster zone to make.  Be careful of the shape you create.  We had to reshape every single cake pop because the shape was too long and thin.  Yup, fun times (please hear sarcasm).  That meant we shaped, chilled and then reshaped and re-chilled every single cake pop before we dipped them.  


Clearly this batch of cake pops wanted to be a problem because we also had issues with the chocolate.

Here is our story. Once upon a time we decided to buy molding chocolate while it was on sale.  That was months ago.  Now when we went to make some, the chocolate did not melt in the right way.  After realizing this and being frustrated we put the cake pops in the refrigerator and waited to go buy new chocolate.

The moral of this story... only use newer chocolate.  Old chocolate will make dipping the cake pops a nightmare.  


So on to the fun part.  After you've dipped them put some of the left over vanilla frosting into a ziplock bag.  Aubree has become a genius with this stuff.  To make the pages take a small tip and carefully make lines across the top and one of the sides.  This creates the pages.

Aubree's Note: Its impossible to make the lines straight and perfect like a book.  After 2 seconds I realized that even with all my OCD, its gonna look messy (more like an old, crinkled book).

Also more fun times while this happened because we could not shake the table.  lol we survived.


The type of icing that you use on the cake pops is also important. The gel type of the left does not harden. So the work you do will smear.... stay away.  We use the icing on the right to write the book titles and authors on the binding.

Harry Potter & Divergent Cake Pops
Made-up titles, just as cool as the classics. 


Pride & Prejudice Cake Pops


Here is our moment to "lightly" mention the reasons why we chose these specific books for this batch of book cake pops.  To say it lightly, WE LOVE THESE NOVELS.  When given a chance to show our love for Jane Austen, J.K. Rowling, and Jodi Picoult, we absolutely could not resist! Just Saying...and some of our recent discoveries like The Hunger Games and Divergent must be added too (just because). When in doubt, go read Harry Potter :)
Oh, and stay away from old chocolate.


Friday, July 6, 2012

Homemade Donuts


We have been waiting to share these with you for sooooo long.  Homemade Donuts!!!! Aside from our Cream Cheese Blintzes this breakfast is probably one of our favorites.  Our mother's fastest way to get us kids out of bed was to have donuts ready to eat.  In our house it's survival of the fittest when it comes to good food.  We realize that might sound a little harsh, but having 5 kids fighting for food can be ruthless.  So yeah, we would get up as soon as possible for these cinnamon sugar donuts because they were just too delicious.

This is truly the easiest recipe ever. It requires biscuits, sugar, cinnamon and some oil to make them in.  Pillsbury makes the biscuits, but the Ralph's brand was on sale for $.49 each so we went with that brand.  Yeah this meal costs $.49 per 10 donuts. CHEAP ftw!

Start by warming up some oil in a pan.  When we normally make these we use a large skillet so more donuts can be cooked at once, but the pan works fine as well.

After we finish we used to save the oil, label it donut oil and then use it again.  This saves money, plus it's kind of a waste to just dump it, but do what's best for you.

Good luck opening the containers.  Aubree had a hard time opening the package, so this is me, Ashley publicly making fun of her :)

So you must be asking how do we easily make biscuits into a donut shape? Well we stole the pumpkin carver from those cheap little kits and use them.  Yup, pumpkin carving tools.  They're perfect.

Dig the tool into the biscuit and twist.  There's some finesse involved, but not too bad. 


Then pull them apart and keep the donut hole.  That's arguably the best part of this recipe. 


Next throw the donuts into the hot oil.  Okay maybe not throw, but carefully place them in so you won't get burnt.  The donut holes get thrown in as well.

Once they puff up flip them over and cook the bottom half.  It takes a few minutes on each side.

For the donut holes, try to flip them around. They're a little more difficult.

While the donuts are cooking put 1/2 cup sugar and 1 tablespoon cinnamon into a bowl.  It's not exact measurements, but basically you want to taste the cinnamon in the sugar.

Once the donuts are cooked place them on a plate that has a paper towel on it.  Flip it over.  This takes the unnecessary grease off.

 Last step is to put the donuts into the cinnamon sugar mix.  Flip them again. And they're done.

These donuts are best warm, so don't wait around.  Truly one of the simple and most cheap recipe we could possibly have.  Plus they're freaking amazing.


Recipe

1 pkg biscuits
1/2 cup sugar
1 tablespoon cinnamon

Use pumpkin tool to make biscuits into donut shape.
Fry in pan of warm oil.
Cook both sides and then let rest on paper towel.
Dip into sugar and cinnamon mixture.
Eat immediately.

Tuesday, July 3, 2012

Grouch Salad


On this side salad, you have to trust us.  We realize that it looks weird, you're probably never heard of it and you're highly suspicious.  That's okay, we're about to blow your mind with this side.  Ever since we can remember our family has been making the Grouch Salad.  Something to do with Oscar the Grouch and it being green gave this dish its name.  All in all the texture is light and fluffy (see Despicable Me reference), and tastes like lime jell-o with a hint of pineapple.

It requires four ingredients: crushed pineapples, cottage cheese, lime jell-o and cool whip.

Start by draining the crushed pineapples and placing them in a medium size bowl.

Add 12 oz of cottage cheese to the pineapples and mix.

Pour in the entire package of lime jell-o powder into the bowl as well.

Once that's all mixed in, add room temperature cool whip.  It's best to let the cool whip thaw--this is what makes the salad fluffy.

And that's it.  Lime-pineapple flavored cottage cheese/cool whip mix.  It's truly an original and unlike anything else.  Grouch is $6 so even if you try it and don't like it there's not much cost involved, however this is a venture worth taking.


Recipe

1 can drained pineapples
1 12oz container cottage cheese
1 lime jell-o box
1 8 oz cool whip

Combine pineapples, cottage cheese, and lime jell-o in bowl.
Fold in cool whip.
Refrigerate or serve immediately


Friday, June 29, 2012

Jell-O Sundae


As the Fourth of July is coming up and July is the National Picnic Month, we thought a little Jell-O Sundae was the perfect answer.  While jell-o by itself might seem a bit mundane, this spruced up version is pure refreshing on a hot summer day.  For picnic style it's easy to just pack the jello in tupperware containers and bring a spoon or put it in a wine glass and be fancy.

For 2 seconds lets talk about how cheap this dessert truly is.  Jello is approx a dollar, so multiply that by 2 and add 2.. the total is $6 for the jell-o sundae.

Berry blue is amazing, raspberry is good--at least it doesn't taste like red medicine!

Find a container to put the jell-o in. Then pour the contents into the dish.

Pour in 2 cups of boiling water and stir continuously thoroughly mixed.  Keep stirring...

and stirring... until its time to add in more water.

Then add in 2 cups of cold water. let it chill for a few hours and then viola, your done!


Spoon out chunks and then add in the whipping cream.
Easiest. Dessert. Ever.


Wednesday, June 6, 2012

Cream Cheese Blintz


In our family this breakfast is the holy grail... well for the majority of the family that is. Cream Cheese Blintzes are perfect for special occasions, or just whenever you're in the mood.  The best part about this is the filling.  Inside the blintz is a warm, creamy, sweet filling which is heavenly with the apple topping.  While Aubree isn't over the moon about these Ashley is. And by george if she could eat them more often she wouldn't be too sad.  Most blintzes are challenging to make, however here at 2 Broke Bakers we have the cheap and easy way to make this delicious breakfast.

In order to make these you'll need the following: crescent rolls, honey, cottage cheese, cream cheese, a topping if you want and a sandwich maker.

Start by making the filling.  1 tablespoon honey, 1/2 cup of cottage cheese and 4 oz of cream cheese.

Have fun trying to open the crescent rolls, they have been known to shock a few people when they actually pop open.

If you survive that then separate them by length wise, not into triangles.  Then take the large rectangle and cut it in half.

Once the sandwich maker has warmed up spray both sides with some non-stick spray. 

Gently add one of the halved crescent rolls onto the sandwich maker and then put roughly 2 tablespoons of the filling onto the dough.

Once you've done this to both sides of the machine through another half onto each of the blintzes so it becomes a sandwich.

Once covered close the machine and let the magic happen.  It will take only a few minutes to cook.

Cook to sight and once they are a nice browned color pull them off the grill.
Once it's all cooked the debate over the topping will ensue.  Some in our family prefer the cheese blintzes plain.  Others prefer a topping, like apple.  We use a pie filling which is found in the baked goods section of the store.

There are plenty of options for the topping as well.  Strawberries or blueberries would both make a delicious alternative.  Throw on some powdered sugar and you're ready to eat.

Once you try these, we believe you will be converted to the easy way to make cheese blintzes.  Then get ready to take a bite, have the filling spill out, and enjoy the warm tasty greatness.

Enjoy!